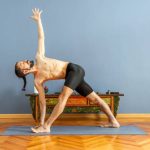


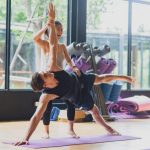
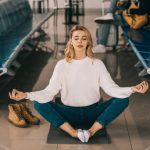
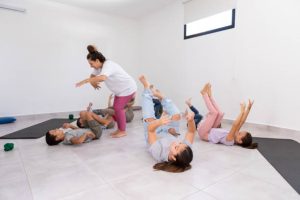

Crow Pose is, in my opinion, the gateway to yoga. This is the first pose students learn that allows them to feel like they are flying. It also opens up an entirely new world of inversions and arm balances.
This is also a foolproof way to check if you are doing Chaturanga properly. If you answered yes, Crow will come into place much easier than expected. You may feel unsteady and fearful of falling. For this reason, I encourage my students to use Crow as soon as possible in class and, especially early on in their yoga practice.
It doesn’t take years of yoga experience to master the Crow pose. All you need is courage and alignment. Here are five poses to help you prepare and achieve the Crow pose.
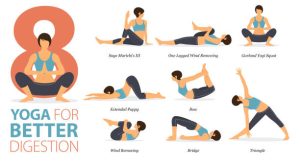
Chaturanga
Take some time to ensure you’re doing it correctly. Use a mirror or ask your teacher for help. You can also use a strap that is tightened around the upper arms, just below the elbows.
How To Do It:Starting on your toes, move forward so that your chest is above your wrists. Bend your elbows toward your sides and lower yourself halfway. Important : Your elbows should hug your sides, contacting the ribs. Your elbows should not be splayed out.
Dip your elbows with your triceps. As your chest hovers over the ground, the biceps form a right angle with the forearms. The chest doesn’t go past the elbows. Crow’s base is this right here, these elbows hugging together and arms right-angled. Hold for three deep breaths.
Anjaneyasana
Low Crescent Lunge has to be one of my all-time favorite poses, mainly because it helps relieve the tension that builds up in our hip flexors from sitting. One Crescent a Day Keeps the Doctor Away! Allow yourself to breathe and relax here while stretching the muscles we use to do Crow.
How To Do It:From Downward Dog, step your right leg between your hands. Lower your back leg to the ground. Place your hands on your right thigh and press the leg forward. This will allow your pelvis to release down and slide in front of your left back knee.
Hold for 3 to 5 deep breaths in a position that is uncomfortable but NOT painful. Repeat the process on the opposite side.
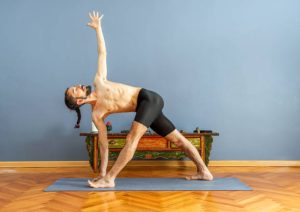
Prasaritha padottanasana
Crow simulation is a necessary but unexpected part of Crow preparation. Pay attention to how you react when you are upside down. Your body will tilt upside-down as your hips rise higher than your head, and your Crow moves forward.
How To Do It: Step to the end of your mat with your heels facing outward and your toes slightly twisted. Bring your hands up to your hips, and then pull your kneecaps upwards to contract your quadriceps. Hinge your hips and lower with a flatback until you, at the very last moment, place your hands under the shoulder blades.
Then, walk your hands backward slightly to create a Chaturanga-shaped shape with your arms. The biceps should be parallel to the floor, and the elbows above the wrists. The bend in your elbows will help you lower your crown closer to the floor. Continue to roll your weight onto your feet while raising your sit bones, lengthening your hamstrings. Hold for five deep breaths.
Utkatasana
Imagine Chair Pose is a Crow Pose perched. Both poses have their legs bent and contracted. In Utkatasana, take time to examine where you feel your legs constricted. Focus on the strength you need to fuel your Crow.
How To Do It: Stand at the top edge of your mat and step your feet together with your big toes in contact. Sit back in an imaginary chair by bending your knees. Raise your arms up, keeping the biceps parallel to the ears. Your tailbone should be pointing towards the floor.
Contract your stomach inwards and upwards. Relax your shoulders and neck muscles by easing your shoulder blades. Spread your chest and reach your heart to the ceiling. This is an energizing pose. Hold it. Hold for 5 to 10 breaths. Continue to sit deeper without collapsing your chest.
Malasana
Yogi Squat, or Crow, is a pose that we use to transition into Crow. This pose is low, deep, and difficult. It allows us to take off easily. This pose can be a breeze or frustrating, depending on how flexible your hips are. Close your eyes, and feel your body open.
How To Do It: Step to the edge of your mat. Toes and heels out. Sit low and keep your heels firmly on the ground. Step your feet wider or onto the mat outside or onto a block to stabilize your posture if your heels are lifting. Bring your hands up to your chest and press your thumbs in. Use your elbows to push the thighs away.
Imagine that your knees are stretched to the opposite side of the room. Imagine a string tied to your head, which lifts your upper body and allows your pelvis to sink further. Close your eyes and hold this position for 5 to 10 breaths.
It’s Time to Fly!
Bakasana, or Crow Pose. Plant your hands in front of your legs, starting from Malasana. As you shift forward, come high on your toes. Find your Chaturanga arm, the right-angle arm, which will be your base. Your elbows should draw inwards and align over your wrists.
Remember that crows sit on branches just like your toes start out by sitting on the ground. Feel free to remain here while you build strength or bring your knees slowly onto the backs of your triceps. This is the meaty area between the deltoid muscle and triceps, about a third below the shoulders.
Important! You must lean to the right in order to find your Crow. Now, you can glide towards it. Lean into the fear. You will not fall if you are on a solid base.
You can keep your toes on the perch while you strengthen your triceps, extending your sit bones and stabilizing your torso with your abdomen. As your Crow flies, you can lift your feet one at a time, with your heels moving towards your glutes.


+ There are no comments
Add yours