


That blustery breeze in the air means that wintertime is around the corner. You can finally rock your favorite holiday sweater, sip on some warm cider, and slow things down. We can follow nature’s lead and, just like the grizzly bear, take our active yoga practice into hibernation.
Most yoga classes require students to hold a pose for five or ten breaths. However, in Restorative Yoga, they stay for between five and twenty minutes. There are many benefits! The benefits are endless!
Are you ready for a Restorative Sequence for the cold season? Be sure to have your favorite yoga mat, three blankets, and 1 or 2 firm pillows or bolsters.
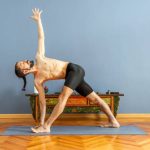
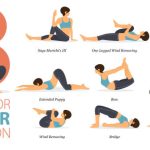
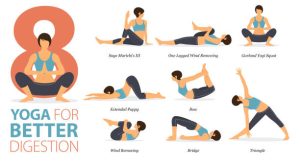
Here are the top five restorative poses for yoga:
Side-lying “Spooning Pose”
Start by folding a blanket in half twice and placing it on the mat’s short end. This will act as a pillow. Fold another blanket just once in half and lay it on the mat to create a platform that will support your torso. These blankets should be placed so that your spine and neck remain in a neutral position.
Your bolster is now ready. Sit on your right, with your left leg propped up on the bolster. Slide your right arm under you and place your left arm by your side.
You can explore gentle movements with your arm to increase your relaxation. Set a halfway point timer, and at that point, roll to the left.
Queen’s Pose
Make a T with the two blocks on your mat. This will provide a secure set-up for your neck. Place your bolster lengthways, with the upper part resting against the blocks. Then, place the soles of your feet together in Baddha Konasana (Bound Angle Pose) and sit at the base of your bolster.
Place one blanket on each side of the thighs. Finally, recline your back while keeping your arms at your side.
Surf Board Pose
Caution: this is a prone position and not suitable for pregnant women.
Fold the blankets lengthwise in half and stack so that they cover half of your mat. Place a third blanket width-wise on the back of your mat.
Lay face down and roll up the blankets to cover your entire thigh. Keep your lower back free of pressure by resting your top ankle on the blanket. Your palms should be facing down. Hold your hands in a cactus style.
Set a timer and rest your right ear against the mat. At the halfway point, switch to your left side. This will keep your neck flexible.
Supported Legs up the Wall Pose
Start by sitting sideways so that you can move your hips towards the wall. When you feel connected to a wall, turn onto your back and place your feet on the wall to provide support. Lift your pelvis so that you can put your bolster under your mid-to-lower back toward the top of your pelvis.
The bolster will elevate your hips off the floor. Keep your palms raised and extend your arms wide to get the most heart-opening stretch.
Supported Deep Relaxation Pose
Place the bolster under the spine in a lengthwise direction while keeping your hips on the mat and your legs straight. Fold a blanket over the bolster for a neck pillow.
If the above arrangement causes discomfort in your lower back, try lying on your stomach with the bolster under the knees. One blanket is folded under your head, and another blanket is placed on your belly. Don’t forget to bring your eye pillow.
Your comfort is the key to a restorative practice! In these poses, let go of the need to achieve anything. If you have a goal in mind, it should be to find complete and utter happiness while remaining connected with mindful breathing.
You will not only heal your body and mind but also develop a greater love and appreciation of yourself.


+ There are no comments
Add yours